Difference between revisions of "Compact view"
| (4 intermediate revisions by the same user not shown) | |||
| Line 1: | Line 1: | ||
| − | As an alternative to the default user-interface, you can switch to ''Compact view'' to | + | As an alternative to the default user-interface, you can switch to ''Compact view'' to interact with the app through a minimal user-interface which is helpful when you don't want the application cover a large portion of your screen. |
To switch to compact view, click '''Compact view''' button on the top-right side of the application window, next to the minimize/maximize button. | To switch to compact view, click '''Compact view''' button on the top-right side of the application window, next to the minimize/maximize button. | ||
| Line 6: | Line 6: | ||
<br clear=all> | <br clear=all> | ||
| − | Once you switch to compact view, a minimal user-interface replaces the default one. This user-interface appears on top of the screen for | + | Once you switch to compact view, a minimal user-interface replaces the default one. This user-interface appears on top of the screen for [[Screen_capture|Screen]], [[Device_capture|Device]] and [[Audio_capture|Audio]] capture modes while you can move it to anywhere on the screen. |
[[File:compact-view-2.png|frame|left|Figure 2: Compact view]] | [[File:compact-view-2.png|frame|left|Figure 2: Compact view]] | ||
<br clear=all> | <br clear=all> | ||
| − | |||
If [[Area_capture|Area]] capture mode is selected, compact view appears on one side of the selected area while a frame is displayed around it. You can change the selected area by moving or resizing the frame. | If [[Area_capture|Area]] capture mode is selected, compact view appears on one side of the selected area while a frame is displayed around it. You can change the selected area by moving or resizing the frame. | ||
| Line 16: | Line 15: | ||
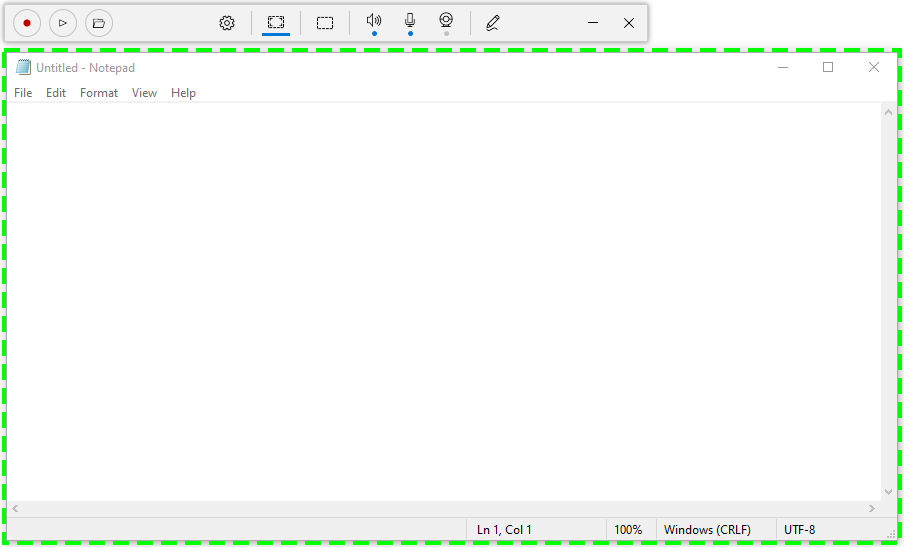
[[File:compact-view.png|frame|left|Figure 3: Compact view (Area capture mode)]] | [[File:compact-view.png|frame|left|Figure 3: Compact view (Area capture mode)]] | ||
<br clear=all> | <br clear=all> | ||
| − | |||
To switch back to the default user-interface, simply click the '''Close''' button on the compact view. You can also use [[Hotkeys]] to switch to compact view by keyboard shortcuts. | To switch back to the default user-interface, simply click the '''Close''' button on the compact view. You can also use [[Hotkeys]] to switch to compact view by keyboard shortcuts. | ||
Latest revision as of 10:53, 26 May 2023
As an alternative to the default user-interface, you can switch to Compact view to interact with the app through a minimal user-interface which is helpful when you don't want the application cover a large portion of your screen.
To switch to compact view, click Compact view button on the top-right side of the application window, next to the minimize/maximize button.
Once you switch to compact view, a minimal user-interface replaces the default one. This user-interface appears on top of the screen for Screen, Device and Audio capture modes while you can move it to anywhere on the screen.
If Area capture mode is selected, compact view appears on one side of the selected area while a frame is displayed around it. You can change the selected area by moving or resizing the frame.
To switch back to the default user-interface, simply click the Close button on the compact view. You can also use Hotkeys to switch to compact view by keyboard shortcuts.


